Showing posts with label swapbot. Show all posts

Thursday, February 23, 2012

A Very Vintage ATC Series- ATC's 1-4

As some of you may know I am part of a Tim Holtz loving group that swaps through swapbot. I LOVE this group and the amazing ladies in it. I have been running a "Very Vintage ATC" series for the past few months (and will continue to do so as long as people are enjoying themselves!) and I wanted to share my first four creations with you. (For those of you who don't know- an ATC is an Artists Trading Card and has to be 2.5 inches x 3.5 inches in size).

The first swap in this series was titled, "A Very Vintage Christmas ATC." I created the following ATC by using a couple different graphics from The Graphics Fairy Blog- a fantastic site to find a vast array of vintage images. I cut out a second cape and placed it over the first one using dimensional adhesives to give this card more visual interest (the affect can't be fully appreciated in this particular photo).
The second swap in this series was, "A Very Vintage Free Theme ATC." I had a lot of fun creating this and spent a lot of time with it as well (or at least more time than an ATC usually takes me) due to the multiple step process and drying times of certain elements. I used a real vintage book page as the background and collaged using cut-outs from the Conservatory stack by 7 Gypsies (which a lurve). I also used a few Tim Holtz products (like the file folder tab die and distress inks).
For the third swap I of course went with a valentine theme- "A Very Vintage Valentine ATC." Again I used images from The Graphics Fairy Blog. In fact, the little boy and girl were two completely separate images, but they so obviously belonged together in my opinion. The girl was originally holding a bow which I cut out of her hand and placed the heart to make it look as if she was taking it from the little boy. The background is done with a variety of Tim's grunge stamps using distress inks and the words were printed off my computer.
The most recent swap in this series was, "A Very Vintage Lady ATC" in celebration of March being National Women's History month. I covered my ATC base using a section of real sewing pattern which I then stamped on top of. I also stamped the women onto sticky back canvas and colored the dresses with distress inks. Once dry, I cut them out and placed them over the original stamped dresses. Again, the texture and dimension of this can only really be appreciated with the card in hand.

I had never even heard of ATC's until I joined swapbot, but now I thoroughly enjoy creating them... they are such a great way to expand your creativity and practice new techniques and styles while also fine-tuning the things you are already great at!
As always
Angela
If you have any questions on supplies used please feel free to ask! And you know I do love any and all comments!

Thursday, February 16, 2012

Altered Board Book: Love Theme

It has been awhile since I spent more than a few hours on any one particular project. Recently I joined a swap (through swapbot) where I had the opportunity to do just that... spend A LOT of time on one project. The swap was for altering a children's "chunky book" in a love theme. The experience was a little nerve-racking at first because I had a bunch of muddled ideas running through my head, but I couldn't get myself to commit to any one particular direction. I started with the cover first and once that was done the entire book just started coming together. So here it is... my very first Altered Board Book (Love Theme)!

I used Kraft card stock to cover all of the pages of the book before beginning. For the cover I utilized various stamps to create a lovely background. I then used Tim Holtz dies to create the flourish accents (that was from the Hanging Sign die) and the center bookplate (which I die cut from an aluminum can and colored with Ranger Alcohol Ink). I also created a closure with the Hardware die, grungeboard and a hitch fastener (an idea which I picked up from Tim Holtz). Other supplies used were gel pen, brads, E-6000, Rock Candy Crackle Paint, vellum paper with the word "love" and Distress Inks. The binding on the spine is Tissue Tape.

Next up is pages one and two. These pages are a combined theme and I used the post card as a way of turning them into a cohesive unit. I wanted these pages to reflect vintage inspired love letters and postal themed elements. I created a small tear in the post card for visual interest. When adhering this card, I left a space that was not glued down so I could have a small pocket affect for a tag. The tag was created using bronze UTEE and a postal rubber stamp.


Page two contains an excerpt from a love letter between Robert Browning and Elizabeth Browning. I hand wrote this on a linen textured card stock that I then crinkled and rubbed Vintage Photo Distress Ink over. The seal was created using bronze UTEE and a wax seal. I also added a Tim Holtz pen nib to this page.
Page three was created with two La Blanche stamps and a Tim Holtz stamp then colored in with a variety of Distress Inks. I also removed two of the books pages and used tissue tape to fill in that gap which you can see between page three and four.
Page four was inspired by an ATC I recently created- it is essentially a larger scale version of the same design, but I loved it so much I had to use it for this book. The two adorable little valentine children came from The Graphics Fairy blog (if you love vintage images, you MUST check this site out). I printed the saying out on my computer and the background is comprised of various Tim Holtz "grunge" background stamps and Distress Inks. I also used Glossy Accents over the heart on the little girls pants.
The final pages are a combined theme just like page one and two. For these pages I used these mini paper bag style envelopes and inserts for excerpts from a book titled, This Is My Beloved by Walter Benton. The keys and key holes were die cut from the Tim Holtz/Sizzix Hardware die and given a coating of bronze UTEE. Again the background consists of Tim Holtz background stamps and Distress Inks.

Here is an example of the cards inside the envelopes... they are all hand written. I distressed the edges of each one using my Tonic/Tim Holtz paper distresser and then added Vintage Photo Distress Ink.
And finally, the back cover... I spritzed over the back with a shade of Glimmer Mist (Red Velvet) and also a shade of Perfect Pearls Mist (Heirloom Gold). You can also see the full grungeboard closure here.

And that's that! I'm not going to lie... I had a hard time letting this one go! I just hope the person who received it really loves looking at it as much as I loved making it. I guess that's all we can really ever hope for when we put our heart into something and give it away to someone else.
Well, I know this post was very "down to business" so to speak, but I wanted to be sure I shared as much detail as I could about what I used/did. However, if you have ANY questions at all- about products, techniques... anything- please feel free to leave a comment and I will do my best to answer!
As always
Angela

Friday, July 15, 2011

Have Bind-It-All... Will Create!

I finally received my Bind It All order in the mail! (I hate waiting for online orders... bleh). It came yesterday and I was so excited to rip into, but once I had it open I sort of had a creative freeze. For the past couple of weeks all I've been able to do is think of ALLLL the amazing things I would make with my BIA, but there it was- right in my hands- and I was terrified! All I could think of was messing up everything I tried to make. My BIA sat on my work surface all day long... garnering passing glances from me. I felt we were sort of sizing eachother up. By the time my evening freedom (known as putting the kids to bed) rolled around I was ready to give show my BIA who's boss. So here it is... my very first BIA project! And wonder of all wonders... I didn't mess up a single time! Perhaps it was a case of beginners luck, but I'm not here to split hairs.
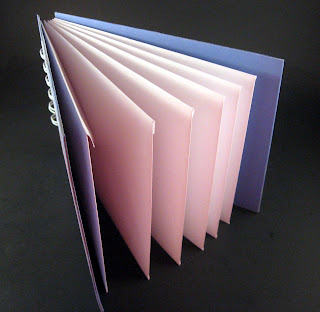
I created this to be an Envelope Ephemera Book (for holding ephemera and various paper bits) for someone on swapbot who is currently organzing her craft space. The cover image is what I am most proud of because she likes images of animals holding umbrellas and I had this from a card I had received and just cut off the front to use on something in the future. I knew it would be perfect for her!

The only thing I wasn't 100% pleased with was my binding job... it was just ever-so-slightly wonky. I'm sure it's just a matter of practicing!
I placed a total of 6 envelopes inside. I figured that would be enough space for breaking down ephemera into cattegories if she wants.


So there you have it! I don't mean to toot my own horn (ok, yes I do...), but I'm really happy with how it turned out. I hope it will make the recipient very happy!
As always
Angela

Monday, July 11, 2011

Where, Oh Where Have I Been?

I've been a little MIA lately... not just on my blog, but my etsy shop as well. So where have I been and what have I been up to? Well, I've been down the crafting rabbit hole. Let me explain... I am part of an online community called Swap Bot. This is a forum for joining in on public or private swaps with people from all over the world (or just your own region if you prefer) for almost ANYTHING your heart desires to swap. A few months ago an incredible group was started called the Tim Holtz Addicts group which I was invited to become a member of and was then made an officer. I was in craft heaven! As a lover of the Tim Holtz aesthetic I had finally found my "home" and proceeded to host and join in on many swaps. Since then most of my crafting time has been consumed with creating items for these swaps. I am also now a co-founder of the group which has been great! Needless to say my etsy shop and my blog naturally fell to the way-side. Hopefully I will be able to get back into the swing of things. As a start, let me share some of the things I have made in the past couple months for various swaps. And believe me, this is just a very small sampling. Ok, enough of my chit chat (or should I call it "type tap"?).

This is a charm bracelet I created for a swap I hosted. It now has a loving home in Switzerland!
These guys are images from the Tim Holtz Steampunk stamp set from Stampers Anonymous. I used them to create these little bottle cap magnets.
And here they are again (can you tell I love this stamp?)! These were made for a Tim Holtz Fragments swap.
This tag is made from all recycled materials and the use of Distress Inks and alcohol inks (both from Ranger). The wing of the bird moves!
Here is my second matchbox (which is also now in Switzerland with the same proud owner of the charm bracelet). I had sooo much fun making this and finding all the tiny elements for the inside. These are addictive to make!

Well, like I said-- that is just a small sampling of what I have been up to. You can view so much more on my Flickr Photostream. I hope you'll be inspired to fall down your own crafting rabbit hole!
As always
Angela